NEEDLES.
(photographs by me)
In this first section I am writing about Hypodermic needles or any sort of needle that is used for injecting fluids or taking blood and other fluids. Later I shall mention making needles. Most needles are single use which reduces the possibility of cross infection. In some hospitals some needles may be re-used and from time to time will need re-sharpening. To do this you will need a number of things, oil, cotton wool, a fine sharpening stone such as an Arkansas stone, a Belgian coticule or Japanese water stone, and a magnifying glass. Roughly speaking needles are sharpened to two angles, a shallow angle for general needles and a steep angle for spinal needles. The needles are sharpened to 2 angles, a short bevel which will be 17 degrees +/- 2% and for a long bevel 11 degrees +/- 2%. These figures are for interest only as you won’t be able to measure this angle to any accuracy, and apart from that, I am sure that it doesn’t matter a jot if the angle is a few degrees more or less. Obviously, if it is very steep it will make it difficult to get in, and if it is very shallow it will weaken the point. They may be sharpened with a straight edge as shown below, or with a curved edge.
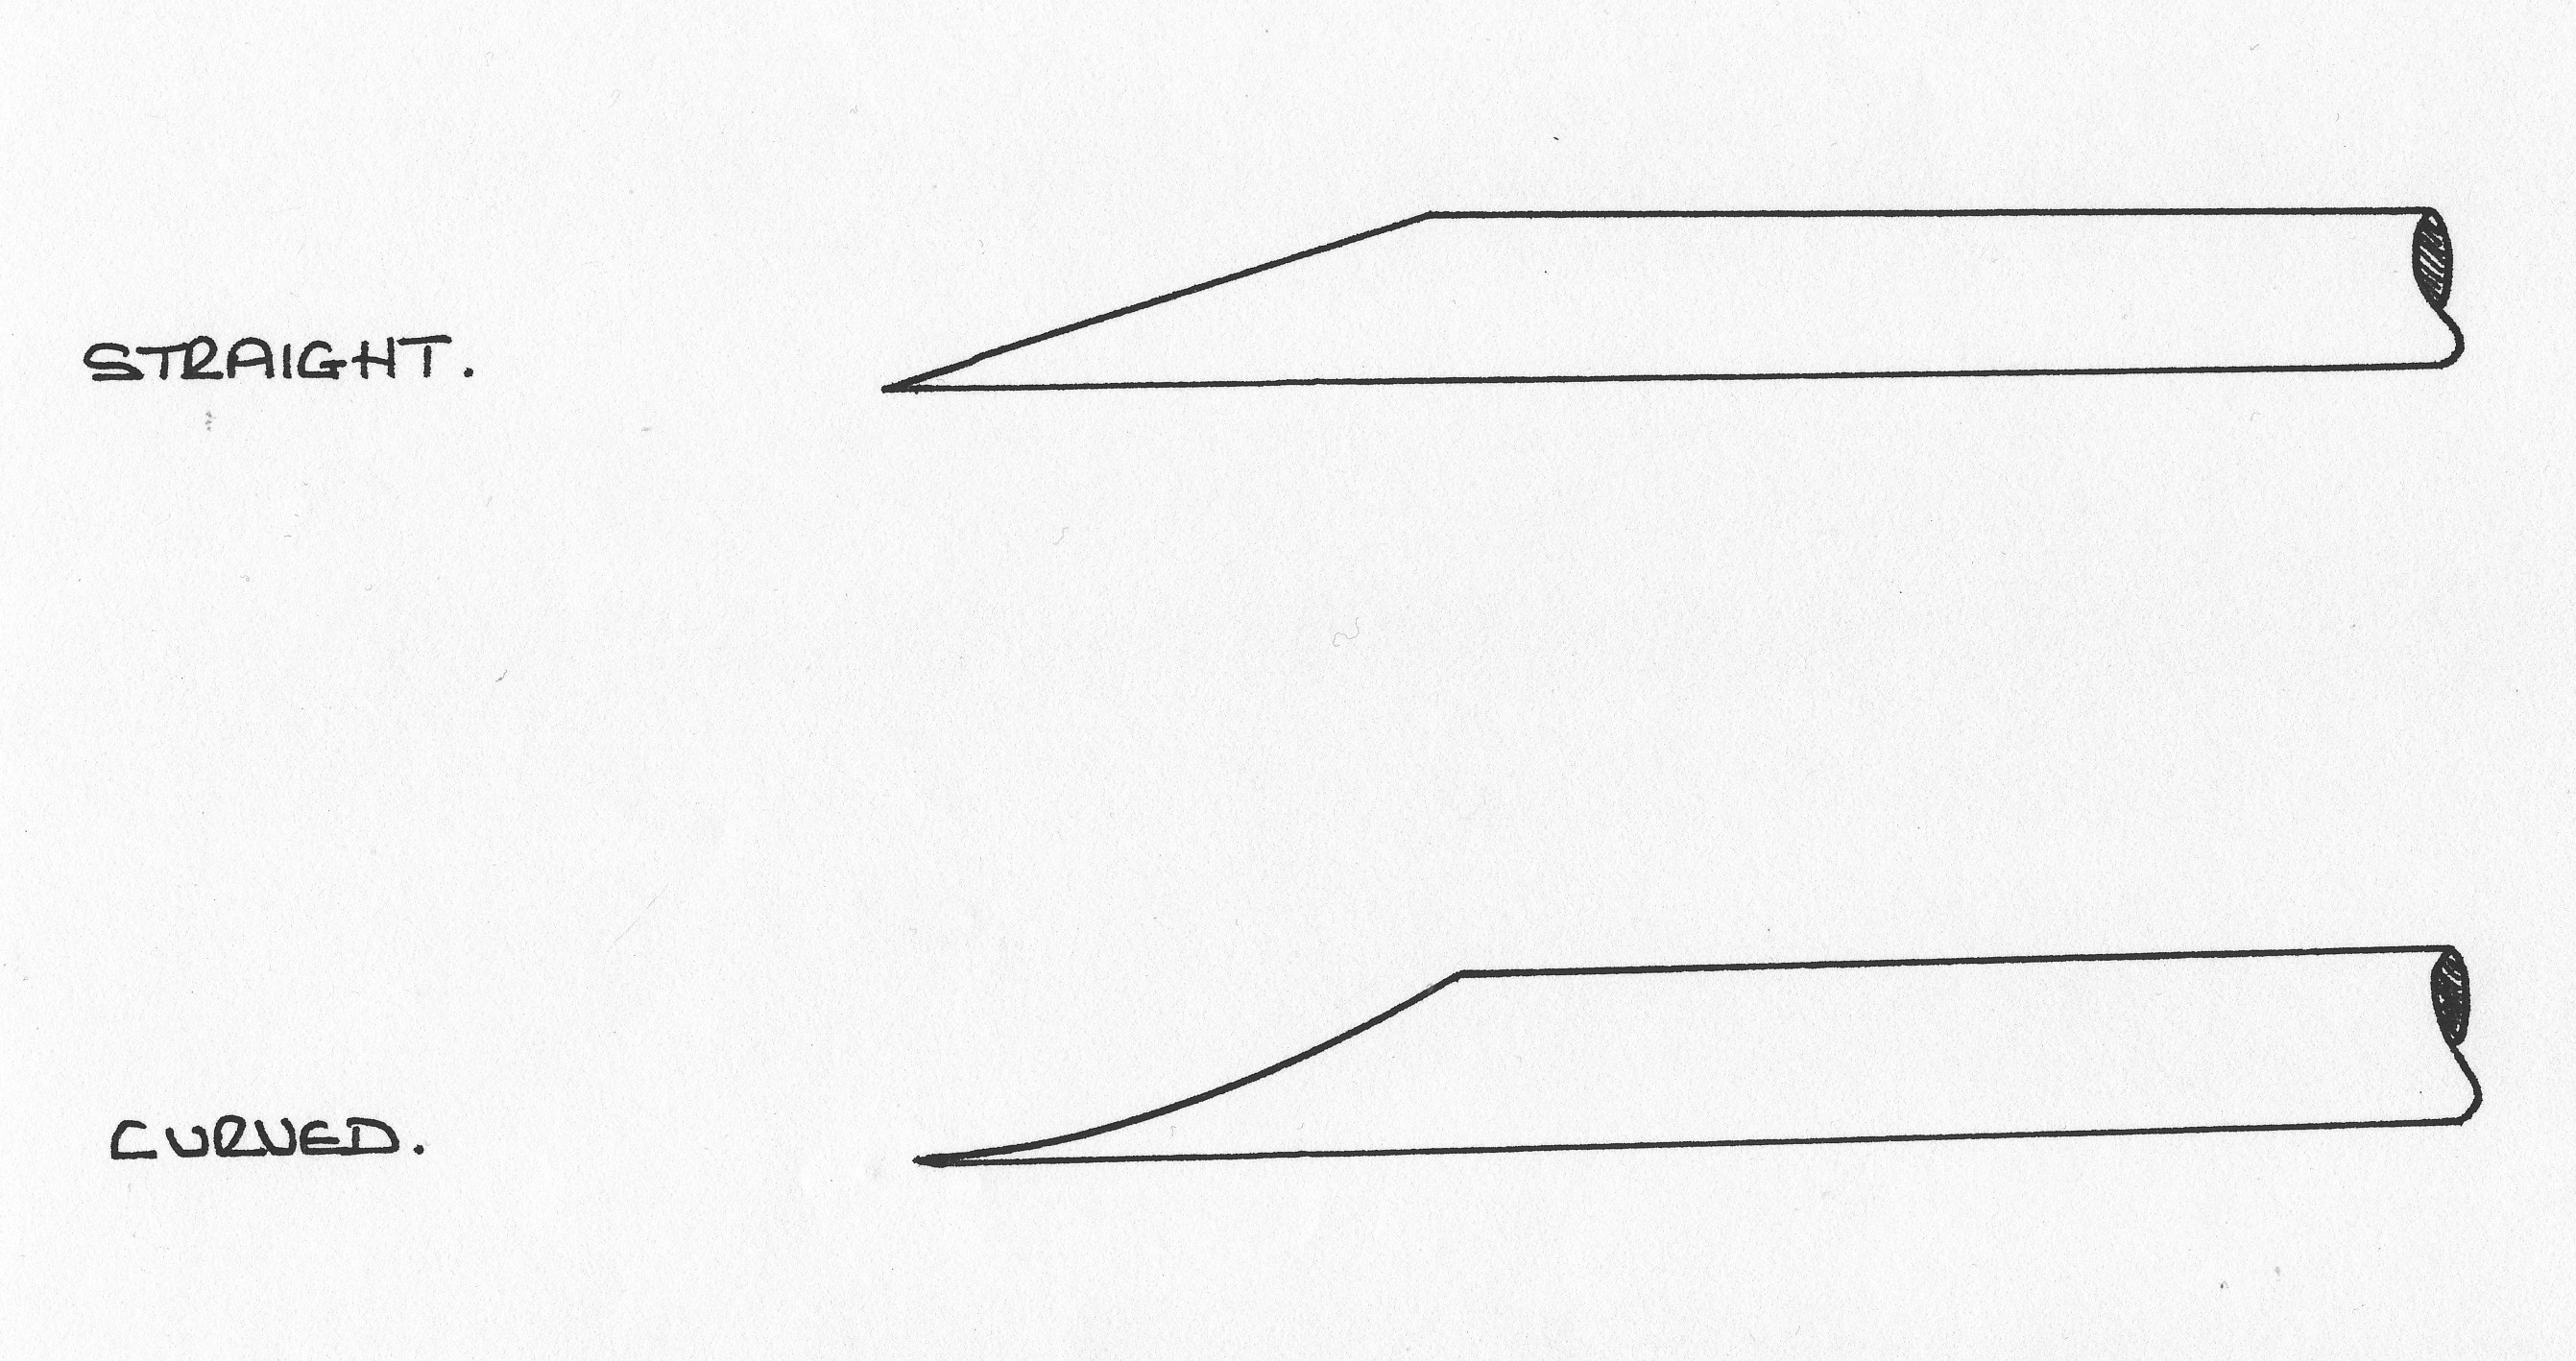
 Which one you choose to do depends on the sharpening equipment you have, I’m not sure that the doctors that use the needles really care which you do providing it is sharp. The straight-edged needle is done on a flat stone (as shown above) and the curved one is done with a round stone, if you have a lathe then what is done is to put the round stone in the lathe and with it spinning towards you, sharpen against that. With a gentle hand you can get a very nice finish this way, remember to keep the stone lubricated with oil, or even water if you don’t have oil. When using the lathe in this or any other way, do use eye protection, and keep your hands and clothing away from the spinning chuck. Use the lathe bed or the tool post to steady your hand and to keep a constant angle.
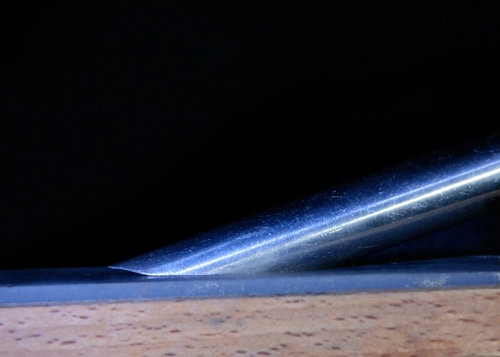
With the flat stone you get the straight edge just by rubbing the needle to and fro till you have it flat and at the correct angle. Having got this you now need to do the sides of the needle and bring them into a point. Make sure that both sides are equal so that the point is in the mid-line of the needle as you look along its length. When you are close to getting the shape correct all round you need to start using a magnifying glass to see what you are doing, it can be done without simply by touch but if you have the glass it will make it much easier. The leading edge of the needle may have a cutting edge put on it, this is done by holding the stone at an angle to the sides of the needle close to the point and just for the last little bit before the point, say the last half, rubbing it downwards and moving the stone away from the point, difficult to explain so look at the photograph below to see that it is just as difficult to draw. 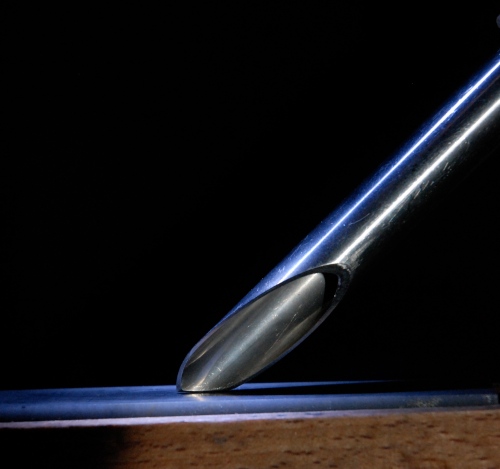 When rubbing down the point do not make it too thin as it will lose its strength, if this has happened then you probably have the wrong angle. Also, inspect it closely with the eye-glass, the part of the needle where the tube comes to an end and the hole opens out where the sharp parts starts, what you are looking for is very thin slivers of metal that have been left behind after the sharpening, these must be cleaned off with an old scalpel blade or something similar, if you don’t they might stick up and make it painful when the needle is being pushed in, and what’s worse is that the sliver might break off and end up inside someone.
When you think that all is sharp, take some cotton wool and pull the needle backwards through it, if there are any rough edges these will catch on the cotton wool. Remove the rough edges should you find any and then re-test it.
Remember that the needle must be really sharp as a blunt needle will be very painful to the patient, apart from that it makes it difficult for the doctor.
If you are sharpening very large introducers or trocars, you may think that they are easier because of their size, in some respects this is true but the trouble is that any errors that you make are much more obvious so you need to be just as careful. Make sure that each of the three sides are absolutely equal, this is something that is not easy to achieve, as with so many other things it doesn’t matter so much as far as using the instrument is concerned, but it is a matter of pride in the job, no doubt anyone can sew up a person that has been operated on but a good surgeon will do it really well and the patient will be left with a neat scar. You should try to polish the faces with a polishing compound such as rouge or with metal polish, it does make them look nice, of course you can also polish the small ones but you are quite likely to blunt them whilst doing it. The finished needle showing one of the cutting edges.
Making needles.
Sometimes you may be asked to make a needle for a special job, this is not as difficult as you might suppose, the hardest part is getting the right material to do it. You will need an old needle, some stainless steel tube of the same size as the needle required, (if your needle is only to be a shorter one then all you need to do is to shorten a longer one of the same type). You will need some means of silver soldering. Take your old needle and heat it up where the tube goes into the body of it, don’t get it too hot or the tube will burn through. When it is hot enough take hold of the body with a pair of pliers and flick it so that the tube falls off, or hold the tube in a vice and pull whilst heating it. Heat again the body that you have held in the pliers and when any solder that remained inside becomes molten flick it out, (take care not to flick it towards someone else). Measure the size of the stainless steel tube (outside diameter), Then drill the body to that size. Put some flux into the drilled hole and on to the tube and silver braze in the tube into the body. Try not to get the tube blocked with silver braze, do this by allowing the tube to extend out of the end of the hole into the main body of the needle just a little, allow it to come out too far and the syringe will not fit correctly. With your tube properly soldered in place you can now cut the tube to the correct length. This is best done on a power grindstone using the edge of the stone. Hold the needle by each end, put the point to be cut on the edge of the stone and revolve it against the stone until it is cut through. Cut it very slightly longer than the finished length of the needle. Decide on the angle you need on the needle and grind it roughly to that angle and length on the power grinder. Now with your ordinary hand sharpening stone and keeping to the same angle, put a point on the needle which is now nice a shape and sharpen as described in the section on sharpening needles. Check that the needle is clear of any obstruction by pushing some wire through it.
